5 Tips for Using Heat and Ice on Shoulder Injuries
| Doctor Carroll
Dealing with shoulder pain? Here's the quick answer:
- Use Ice: Best for new injuries (first 48–72 hours). It reduces swelling, eases inflammation, and numbs pain.
- Use Heat: Ideal for chronic pain and stiffness after swelling subsides. It boosts blood flow, relaxes muscles, and supports healing.
- Safety First: Always use a cloth barrier, limit sessions to 15–20 minutes, and avoid heat on swollen areas.
Key Takeaways:
- Ice works for sharp, throbbing pain and swelling.
- Heat helps with dull aches and stiffness.
- Alternate heat and ice (contrast therapy) after 3–5 days for better recovery.
- Pair these therapies with gentle stretches for optimal results.
Want details? Keep reading to learn how to apply these methods safely and effectively.
Shoulder Pain - Ice or Heat? (which is better for pain relief?)
When to Use Ice vs Heat
Choosing between ice and heat therapy depends on the timing of your injury and the type of discomfort you're experiencing. Using the right treatment at the right time can help speed up recovery and prevent further irritation.
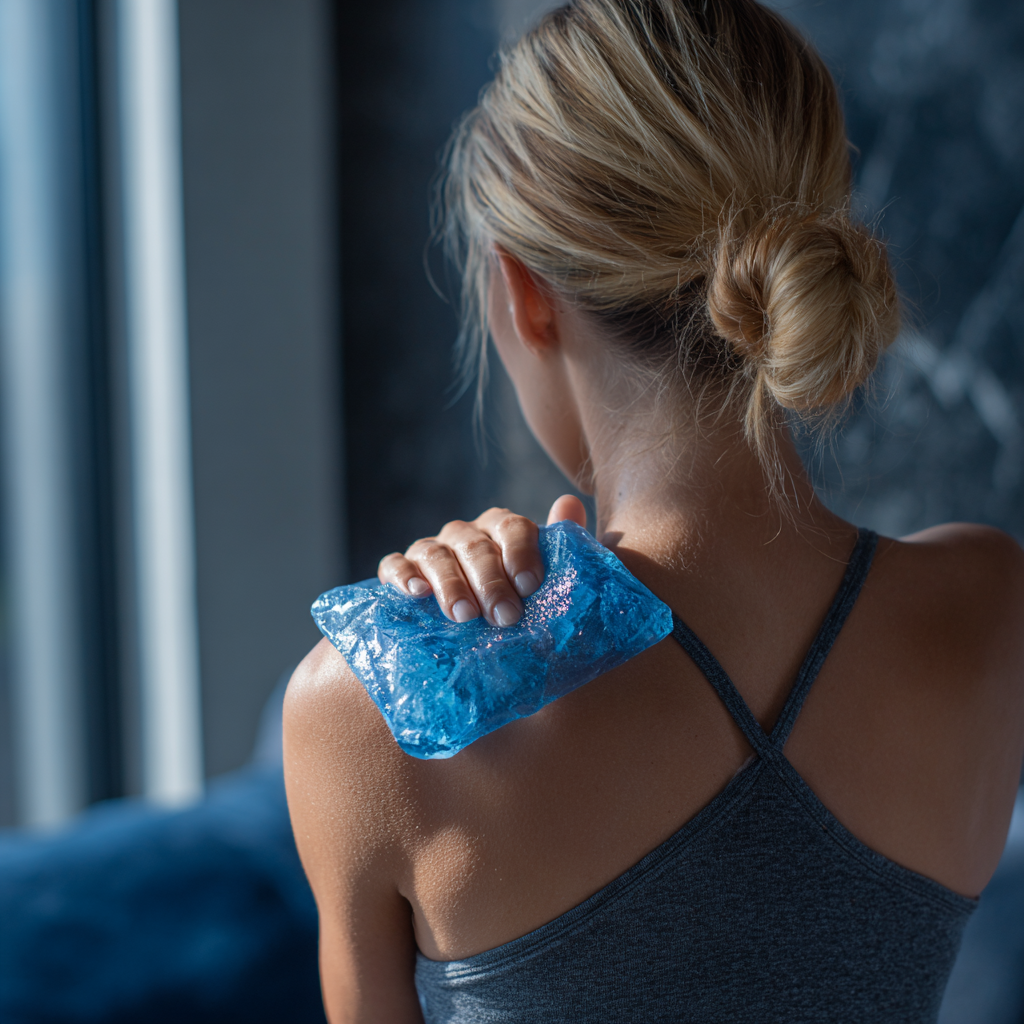
Ice for New Injuries
Ice is your go-to treatment within the first 48–72 hours after a shoulder injury. Whether you’ve strained a muscle during exercise, taken a fall, or experienced a sudden flare-up, cold therapy is the first step. Ice works by constricting blood vessels, which reduces blood flow and helps control inflammation. It also numbs the area, providing quick pain relief.
If your shoulder pain feels sharp and throbbing, ice is likely the best option.
As sports medicine physician Dr. Anne Rex explains:
"Ice wins to shut down swelling, inflammation and pain early on. Heat may actually make an injury feel worse at first."
Heat for Ongoing Pain and Stiffness
Once the swelling has gone down - usually after the first 72 hours - heat therapy can help ease chronic pain and stiffness. Heat works by dilating blood vessels, increasing blood flow to the injured area. This improved circulation brings oxygen and nutrients to healing tissues and helps relax tight muscles. It’s especially helpful if your shoulder pain feels like a dull ache or is paired with stiffness and reduced mobility.
For long-term shoulder issues, heat therapy can provide much-needed relief. Rheumatologist Dr. Linda Mileti notes:
"Patients with more chronic osteoarthritis usually feel better with heat."
Combining heat therapy with gentle stretches or rehabilitation exercises can be even more effective, as the warmth helps loosen up muscles and improve flexibility.
Safety Tips for Heat and Ice
- Always use a thin towel or cloth between your skin and the ice or heat source to prevent frostbite or burns.
- Keep ice therapy sessions to 15–20 minutes, with at least an hour break between applications.
- For heat therapy, use it for 15 minutes for mild discomfort or up to 30 minutes to 2 hours for more severe pain.
- Avoid using heat on areas that are still swollen, as it can worsen inflammation.
- If you’re unsure whether your injury is still in the acute phase, start with ice to address any lingering inflammation, then switch to heat once the swelling has resolved.
Next, we’ll cover how to safely apply ice to maximize its benefits.
How to Apply Ice Safely
Using ice correctly can help ease shoulder pain and reduce swelling while protecting your skin. By following these steps, you can safely enjoy the benefits of cold therapy without risking frostbite or ice burns.
Ice Preparation and Application
Always place a thin towel or cloth between your skin and the ice or cold pack to avoid frostbite. Direct contact with ice can damage your skin, so this step is crucial.
If you don’t have a dedicated ice pack, no problem - there are simple alternatives. A bag of frozen peas, for instance, is great because it molds to the shape of your shoulder[20–22]. Commercial gel packs are another good option, and some instant cold packs are designed for safe use without additional wrapping - just check the label to be sure.
For the best results, wrap your ice pack in a damp, thin towel to improve cold transfer, then place it on the most painful part of your shoulder. You can secure it with an adjustable strap or bandage to keep it in place.
While icing, keep an eye on your skin. Watch for any redness, hardening, or prolonged numbness. If you notice discoloration or unusual sensations, stop immediately and consult your healthcare provider.
Once your ice pack is ready to go, stick to the recommended timing for safe and effective relief.
How Often to Use Ice
For the first 48–72 hours after an injury, apply ice for 15–20 minutes every 2–3 hours, leaving at least 1–2 hours between sessions. Research shows that 20 minutes of icing is ideal for reducing pain without causing adverse effects.
Use the CBAN method - Cold, Burn, Ache, Numb - to guide your therapy. Stop icing as soon as you reach the numb stage. After each session, check your skin for any abnormal reactions. If you have a condition like diabetes, poor circulation, or Raynaud's disease, talk to your healthcare provider before starting ice therapy.
"Ice is used for acute pain, inflammation (swelling), and new injuries... Using the ice helps to narrow blood vessels and keeps swelling down."
- UnityPoint.org
Heat Therapy Methods
Once you’ve mastered the art of using ice safely, it’s time to incorporate heat therapy into your recovery routine. Heat therapy works by expanding blood vessels, which helps deliver more oxygen and nutrients to the affected area. This increased circulation not only aids in tissue repair but also helps relax tight muscles, ease spasms, and improve flexibility in muscles and connective tissues.
"Heat therapy helps to boost circulation, which increases the delivery of oxygen and nutrients to the body's tissues... this can help to loosen stiff joints and alleviate sore muscles." - Arthritis Foundation
Types of Heat Therapy and How to Use Them
Heat therapy generally falls into two categories: dry heat and moist heat. Dry heat sources include heating pads, dry heat packs, and saunas, while moist heat options range from steamed towels and moist heat packs to hot baths. Studies suggest that moist heat may work slightly better than dry heat and often requires less application time[6, 31].
For targeted pain, such as in the shoulder, a heated gel pack or hot water bottle works well. If you’re dealing with more widespread discomfort, try a steamed towel, a larger heating pad, or a heat wrap. For full-body relief, a sauna or a hot bath can be particularly soothing.
To get started, pick a heating pad or compress that feels comfortable. If you’re using a heating pad, place a thin cloth between it and your skin. For a warm compress, soak a clean cloth in warm water, wring it out, and apply it to the sore area. Electronic heating pads typically provide dry heat, while microwaveable pads offer moist heat. Because moist heat penetrates deeper into muscles, it’s often the go-to choice for shoulder injuries[29, 31].
Once you’ve selected your heat source, it’s time to focus on timing and safety to get the most out of your session.
Timing and Safety for Heat Therapy
For most situations, applying moderate heat for 15–20 minutes at a time is enough to ease minor stiffness or tension[4, 6, 11]. If you’re dealing with more severe discomfort, you might benefit from longer sessions, such as a 30-minute to 2-hour warm bath. However, for localized pain, avoid exceeding 20 minutes per session[6, 11].
You can safely repeat heat therapy multiple times a day but make sure to let your skin cool for at least an hour between sessions. The heat should feel comfortably warm, not overly hot[4, 30]. And remember, heat therapy is most effective once any initial swelling has gone down.
Safety is key when using heat therapy. Always use a thin towel or cloth as a barrier between your skin and the heat source. If you’re using a heating pad, cover it with 6–8 layers of towel to avoid burns. Check your skin after the first five minutes for redness or irritation, and stop immediately if you notice blistering, a rash, or excessive redness.
Avoid sleeping with a heat source on, and stay hydrated by drinking water before and after your session. Heat therapy works especially well when used before light stretching or rehab exercises, as it helps prepare your muscles and reduces the chance of further injury.
sbb-itb-43b8b85
Using Heat and Ice Together
Building on earlier methods, alternating heat and ice can be a powerful way to support shoulder recovery. When used at the right times, this combination can help reduce pain and improve healing.
When to Switch Between Heat and Ice
For acute injuries, stick to ice during the first 24–72 hours. Ice helps control swelling and inflammation. Once the swelling goes down, you can introduce heat therapy to improve blood flow and aid tissue repair. However, alternating between heat and ice is best reserved for 3–5 days after the injury.
For chronic conditions, heat works well before activity to loosen up tight muscles and joints. If the activity leads to discomfort, applying ice afterward can help soothe inflammation.
Contrast therapy - alternating heat and cold - is another effective approach. It involves switching between 10 minutes of heat and 10 minutes of ice to enhance circulation and reduce pain. Here’s how to do it safely:
- Use ice wrapped in a towel for 15–20 minutes to reduce inflammation, followed by 15–20 minutes of heat to improve blood flow.
- Repeat this cycle 3–4 times, ensuring at least 30 minutes of rest between cycles. Always finish with cold therapy to avoid increasing swelling .
- Avoid ending your session with heat, as it can aggravate inflammation.
By following these steps and paying attention to your body's response, you can adjust your routine for better results.
Tracking Your Shoulder’s Response
Once you establish a routine, it’s important to monitor how your shoulder reacts. Take note of how it feels after each session - whether the pain lessens, stiffness improves, or discomfort changes. Keep an eye on your skin during treatments to watch for any signs of burns or frostbite, such as redness, irritation, or unusual sensations . If the therapy causes more pain or discomfort, stop immediately.
It’s normal to experience some recurring pain for a few hours after starting contrast therapy. However, over time, the pain should become less intense and take longer to return. If you don’t see any improvement within two to three days, it may be time to consult a doctor for a more advanced treatment plan.
Pay attention to patterns in your shoulder’s response. For example, does it feel stiffer in the morning? Does heat help before exercise? Does ice provide better relief after activity? These observations can help you fine-tune your approach.
If you’ve been advised to stretch or perform rehab exercises, consider doing them during the heat phase. Heat therapy can make stretching more effective and help prevent further injury .
SHOULDER Reliever System
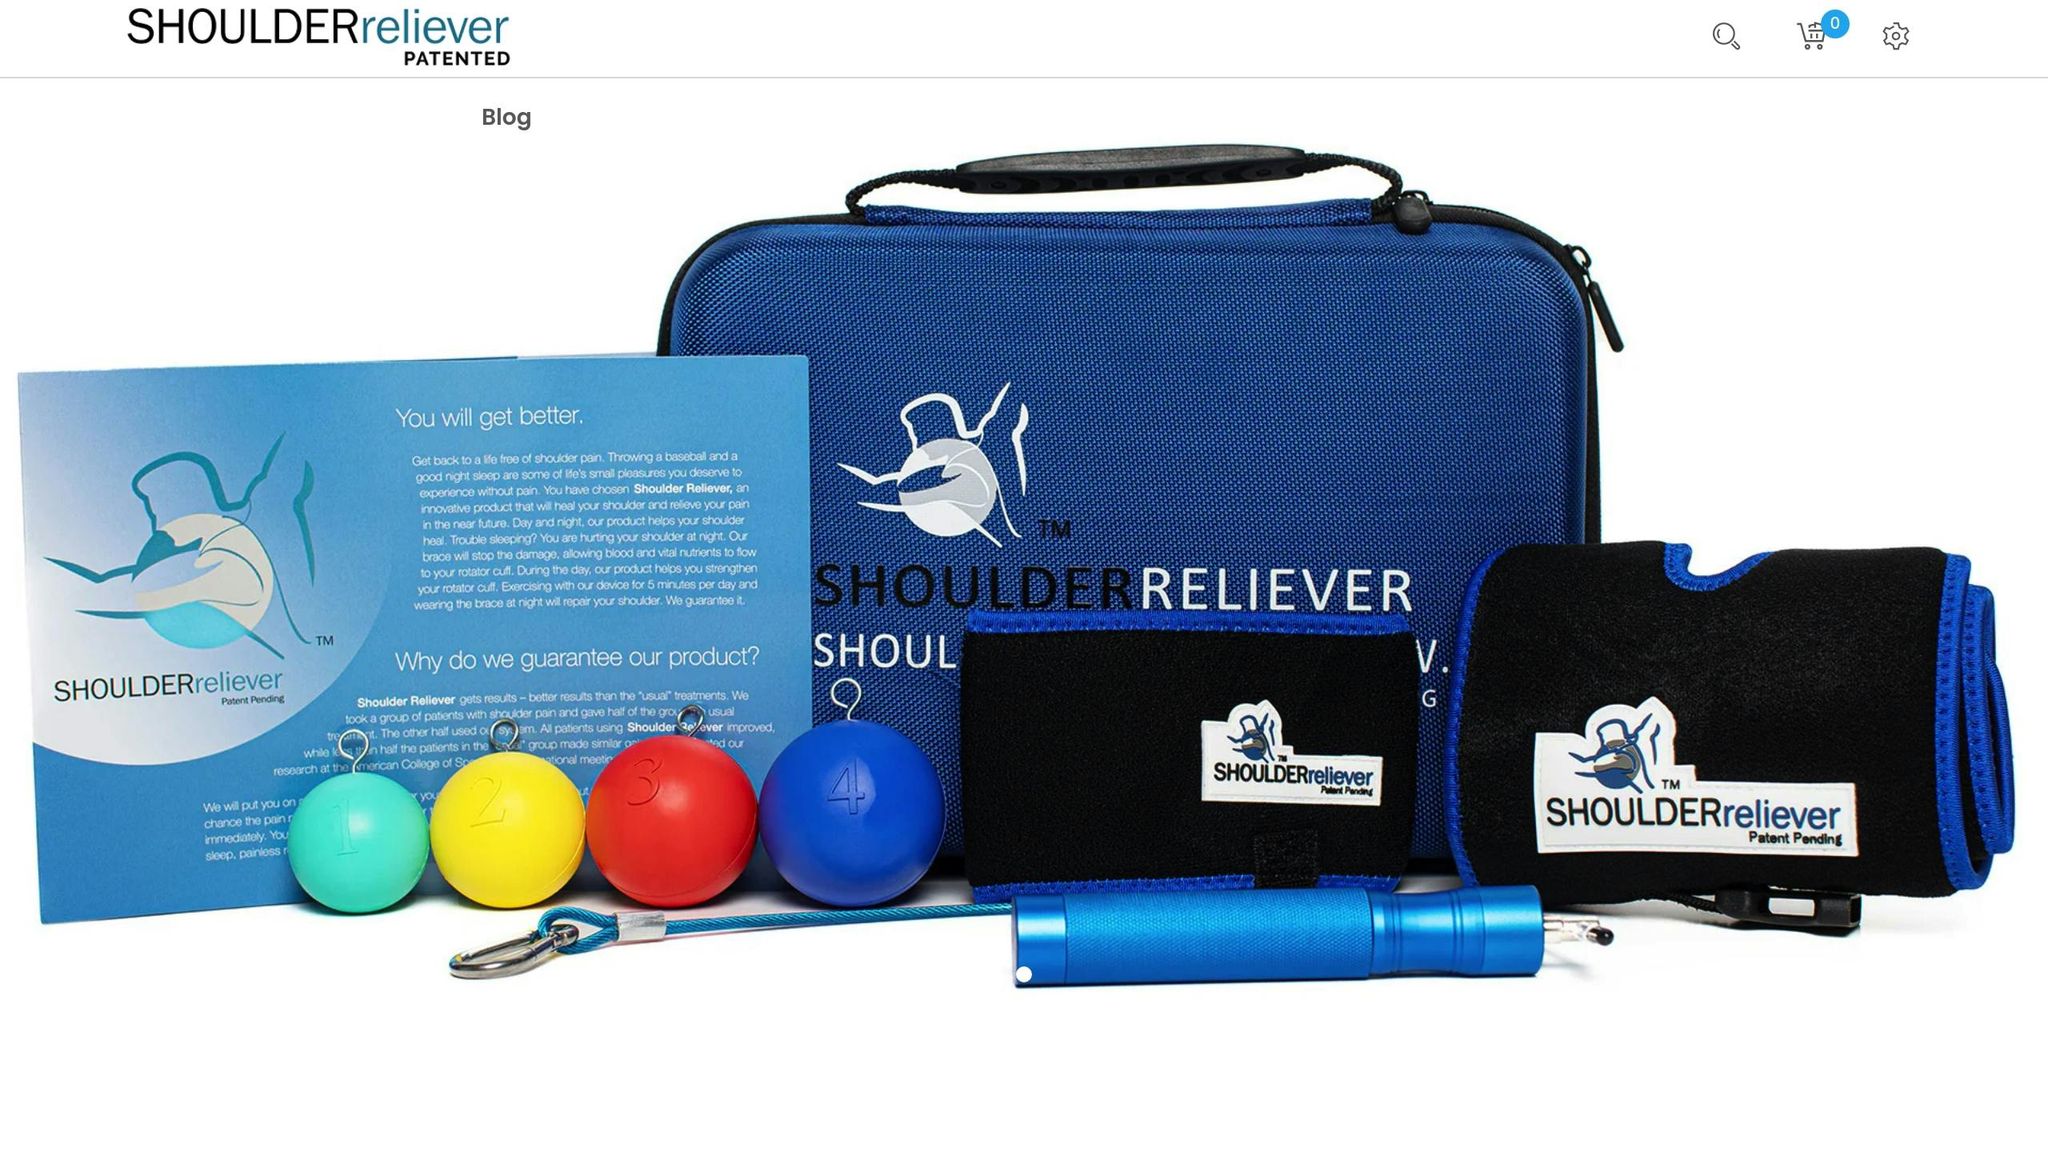
The SHOULDER Reliever system offers a straightforward, two-part solution designed to address the root causes of shoulder pain. With more than 75,000 success stories, it has helped people recover from shoulder injuries without relying on surgery or medication.
How SHOULDER Reliever Works
This system combines a quick, 4-minute daytime exercise with a nighttime support sleeve to deliver round-the-clock care for your shoulder. The daytime exercise routine focuses on strengthening the stabilizer muscles around your shoulder joint. By doing so, it enhances strength, mobility, and reduces pain. At night, the support sleeve plays its part by keeping your arm in a position that avoids harmful pressure points. This setup not only prevents pinching but also boosts blood flow to injured tissues, encouraging natural healing. For best results, start with wearing the sleeve for 1 hour at night and gradually increase to 4 hours.
"Our 5-minute daytime exercise paired with gentle nighttime support increases blood flow and strengthens your shoulder, showing proven results."
– SHOULDER Reliever
Research shared at the American College of Sports Medicine's national meeting highlighted the system's effectiveness. Every participant using the SHOULDER Reliever system experienced improvement, compared to less than half of those receiving standard treatments. These participants had been dealing with shoulder pain for an average of 6 months, with some suffering for as long as 2 years.
"The magic is not in the traction as much as wearing it loosely and keeping it on as long as possible at night. The main benefit is keeping you from sleeping on the affected shoulder and keeping the arm from going above your head. The looser the brace, the better."
– SHOULDER Reliever
This approach works well alongside heat and ice therapy, offering sustained support for long-term healing.
Shoulder Problems SHOULDER Reliever Treats
The SHOULDER Reliever system is designed to address common shoulder issues like rotator cuff injuries, shoulder impingement, and bursitis. It reduces pressure on inflamed tissues while strengthening the muscles around the shoulder joint.
While heat and ice can help with immediate symptoms, this system focuses on repairing the underlying tissues. Whether you're dealing with a recent injury or managing chronic pain, the SHOULDER Reliever system can help. For those experiencing significant discomfort, it’s recommended to pause upper body workouts for 2–3 weeks while using the system to allow proper healing. Plus, it comes with a 60-day money-back guarantee, underscoring the confidence in its ability to deliver results.
Key Points for Heat and Ice Therapy
When it comes to treating shoulder injuries, getting the timing right for heat and ice therapy can make a big difference in your recovery.
Ice is your go-to for fresh injuries, especially within the first 48 hours. It helps by reducing swelling, thanks to its ability to constrict blood vessels, and it also numbs the area to ease pain. Just be sure to let your skin return to its normal temperature between applications to avoid any skin damage. After the initial 72 hours, once the acute inflammation has subsided, heat therapy steps in. Heat helps loosen tight muscles and boosts blood flow to the area, but keep it warm - not hot - and steer clear of applying heat to areas that remain swollen.
The key distinction is this: Ice reduces inflammation by narrowing blood vessels, while heat promotes healing by improving circulation. When used together, as part of a broader recovery plan that includes strengthening exercises and proper support, these therapies can not only provide quick relief but also help you recover more effectively in the long run.
FAQs
How do I know if I should use ice or heat for my shoulder injury?
When deciding between ice and heat, think about the stage of your injury. Ice works best in the acute phase, which is typically the first 72 hours after the injury. If you're dealing with swelling, redness, or sharp pain, ice can help by reducing inflammation and numbing the area.
After the initial swelling subsides - usually around the 72-hour mark - it’s time to consider heat therapy. Heat is great for easing muscle stiffness and boosting blood flow, which can aid the healing process. Pay attention to how your body responds and adjust your approach as needed for optimal recovery.
What are the risks of using heat or ice therapy incorrectly on a shoulder injury, and how can I use them safely?
Using heat or ice therapy incorrectly can worsen a shoulder injury or even cause additional damage. For instance, applying heat too soon after an injury or leaving it on for too long can lead to increased swelling and inflammation, especially within the first 24-72 hours. Similarly, using ice improperly, like placing it directly on the skin without protection, can result in frostbite or skin damage.
Here’s how to use heat and ice therapy safely:
- Ice therapy: During the first 24-72 hours after an injury, apply ice for 15-20 minutes at a time. Always place a cloth or towel between the ice and your skin to protect it.
- Heat therapy: Wait until the initial swelling subsides before applying heat. Use it for no more than 15-20 minutes, and ensure the heat source is warm - not excessively hot.
Sticking to these steps can help minimize risks and support proper healing for your shoulder.
Can I combine heat and ice therapy with the SHOULDER Reliever system for better shoulder pain relief?
Yes, you can pair heat and ice therapy with the SHOULDER Reliever system to boost shoulder pain relief. This approach, known as contrast therapy, involves alternating between heat and ice to help ease pain, reduce swelling, and improve flexibility. It also encourages better blood circulation and supports the healing process. When combined with the SHOULDER Reliever system - which strengthens shoulder muscles during the day and enhances blood flow with nighttime traction - it can provide even more effective relief.
To get the most out of this combination, stick to recommended timing and temperature guidelines for heat and ice therapy. It's also a good idea to consult a healthcare professional to ensure this approach suits your specific condition.